Get one step ahead: prepare your firewood for next winter

An economic and sustainable activity
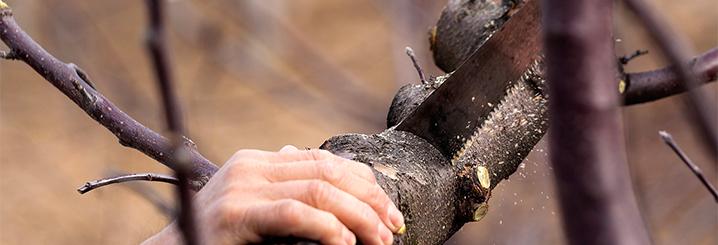
Preparing firewood for the winter is often more stimulating and beneficial than buying it pre-cut from a store. Not only because you save money, but also because you can spend time outdoors in contact with nature while you’re doing it.
And what’s more—when performed in moderation—cutting is part of the sustainable forestry process: careful wood harvesting, carried out periodically on trees in the forest, ensures the cultivation and renewability of its resources. It’s not only beneficial for your wallet, but also for the environment.
Before starting
Of course, you don’t necessarily have to go into a forest in order to collect wood.
You can easily recycle the branches of pruned trees in your back garden.
The important thing is to follow two basic rules:
- Start early
- Invest in a suitable chainsaw
In order for the wood to be ready for burning by the start of autumn, it needs to be cut and stacked at least 6 months in advance. If you live in a particularly humid geographical area, that time should be extended to one year in advance. Properly drying the wood is essential for lighting the fire and keeping it going. Poorly seasoned wood actually releases less heat, burns up quickly and generates more smoke and soot.
Also make sure you have an appropriate cutting device in your garage because, contrary to what you might think, not all chainsaws are the same. For localised and precise cutting work like this, the best tool you can use is a pruning chainsaw such as the MTT 2500 model, or a compact chainsaw such as the MT 3700. Finally, don’t forget to equip yourself with suitable personal protective equipment.
To protect your eyes and face, you can use suitable protective eyewear, a face shield and hearing defenders. Also properly protect your hands, legs and feet by wearing gloves, anti-cut trousers and boots with steel reinforcements.
Perfect, we’re all set.
Now we can finally get down to work.
Cutting wood
To avoid unpleasant mishaps, always remember to work in an open, uncluttered area so that you can handle tools without obstruction. Try to work on flat and even terrain, for greater stability while working, and make sure that the trunk is immobile and cannot move.
If convenient, fix it in place with some sticks. In addition, always operate the chainsaw correctly, by supporting its weight with your left hand and pulling the starter cord with your right hand. For a firmer grip, you can help yourself by placing the appliance between your legs.
Never cut into the ground though, as this may damage or blunt the chain.
To begin with, you can cut logs and branches into similar one-meter long sections, then trim them down at a later time, based on the size of the heater or tool that you will use to burn the logs. Since wood shrinks as it dries, some people prefer to cut logs that are slightly larger than needed. If you are a beginner, be overcautious and cut into small pieces, until you learn how to measure the degree of shrinkage you can expect. If you live in a region with a humid climate, remember to divide the trunk into even smaller sections, to speed up the seasoning process.
Create a woodpile
Once you’ve finished cutting, it’s time to start stacking.
The ideal place to store and season wood is in an area exposed to sun and wind currents.
Transport the sawn logs to the allocated area with the help of a transporter, which is capable of carrying heavy and bulky loads, even on bumpy ground. You can place the wood in a prefabricated woodshed, or build one yourself. Ideally you should arrange the logs in a single row, with the cut ends exposed to the air to ensure even oxygenation of the wood.
If you don’t have enough space available for a single-row layout, stack in multiple rows with a space between each one if possible, to ensure good air circulation. It is also advisable to keep the woodpile raised above the ground, to prevent accumulated moisture beneath it from rotting the wood within the space of a few weeks.
Decide whether you prefer to leave the woodpile exposed or protect it from the rain.
If you opt for the first solution, use a black or transparent plastic sheet: black materials absorb heat and accelerate evaporation, whereas transparent materials allow sunlight to pass through.
Wait until it has dried
Now you just have to wait until the drying process is complete. To check the condition of your wood, pay attention to certain factors, especially its colour. Wood darkens as it dries. When you notice that the insides of the logs have turned from white to yellow or greyish, it means that they are ready for burning.
Odour is another indicator for ascertaining whether wood is sufficiently seasoned. Take a log from the pile and smell it: if you can still smell the resin, the log needs to dry for a little longer. However, if is odourless, your firewood is ready. Finally, if you still have doubts, inspect the bark and weigh the log in your hand: dry wood weighs less than fresh wood and its bark tends to fall off.
Burn it
When you're pretty sure that you are holding dry, ready-to-burn logs, pile some together on a clear, fireproof surface and make a bonfire. If the large pieces and twigs fail to ignite, it means they are still damp and need a bit more time. Whereas, if they catch fire and make a hissing sound, it means that they still contain a small amount of residual moisture. Logs that catch fire within 15 minutes are fully seasoned and therefore ideal for burning.


