DIY Beehive with Reclaimed Wood Planks

Beekeeping is an age-old practice that dates back to the Egyptians and involves carefully rearing bees to collect honey and other products. A hive is a structure built by a beekeeper to house a colony (or family) of domestic bees. Hives as we know them only took on their current form in the 19th century, when the mobile honeycomb hive was invented. Let's clarify a couple of terms: honeycomb is a block of wax cells shaped by bees to contain their brood (eggs, larvae, etc.) and store honey and pollen; beehives are man-made, artificial structures and shouldn’t be confused with bee nests, which are natural homes that bees build for themselves; an apiary, on the other hand, is a collection of beehives.
Bees are social insects and each individual within a colony has specific functions that makes the hive an efficient “organism”. A bee colony always consists of a single queen bee, several hundred males (drones) and thousands of worker bees. The queen's job is to lay eggs, while the drones are needed to fertilise her. The workers carry out all the activities essential to the survival of the colony, including the production of honey, which they produce from the flower nectar they collect and from honeydew (a sugary substance expelled by insects that feed on sap).
To produce your own honey you can buy a ready-made hive, a self-assembly kit. Or, alternatively, you can build one from scratch using this Do-it-yourself article. So today, let’s find out how to build a DIY wooden hive. First though, we will outline what exactly looking after a beehive entails.
Before building a wooden hive: what you need to know
Building a bee house, choosing the most suitable breed for the area where you live, purchasing a colony and situating the hive in an optimal position are not enough to produce honey. Raising bees, even for self-consumption only, requires not only dedication and time, but also study in order to learn about the biology of bees, the diseases and parasites that affect them, techniques for maintaining the hive, and so on. There are numerous activities that you will have to do as a beekeeper throughout the year, although the peak period is the summer season, when the bees are at their most productive, up until the end of the flowering period when you will harvest the honey (honey extraction).
Visiting the hive is an ongoing commitment, but essential to ensure that diseases and parasites do not spread uncontrolled. Particularly in July/August, after the honey harvest, and in autumn-winter it is necessary to carry out treatments against the disease with the greatest impact on beekeeping: the endemic varroatosis. The apiary must be kept in order and the grass in front of the hives cut to make it easier for the bees to enter the hives. For this purpose, depending on the vegetation and the size of the area, you can use a brushcutter, garden tractor, wheeled brushcutter or shredder.
The honeycombs need to be regularly replaced or cleaned and the hives themselves need to be maintained. From late summer you will prepare the hive for the colder months (winterising) and you will need to assess when supplies are low and the bees need extra food etc. If you decide to practice nomadic beekeeping, also take into account the transport and positioning of the hives to “follow” the bloom of specific flowers.
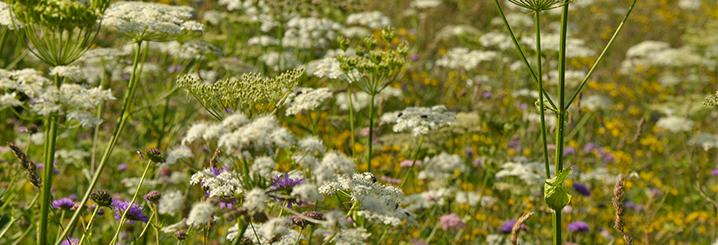
Choosing the location of the hive is crucial to ensuring a healthy colony and providing the bees with abundant resources. Choose a quiet, dry area that is shaded in summer, sunny in winter, sheltered from cold winds and far from sources of pollution, such as intensive crops and industrial sites. Check if there are other hives or apiaries nearby: they will compete for resources and, if poorly managed, pose a risk of spreading disease. The hive must be close to food sources – nectar and pollen, which should be available if possible from spring to summer – and to sources of unpolluted water (alternatively, place a watering station nearby). In this regard, the presence of orchards or vineyards that are responsibly managed using anti-parasitic treatments, especially during flowering, can be invaluable (in turn the bees will get to work pollinating and thereby providing the crops with a useful service).
To help the bees orient themselves so that they don't go to the wrong hive, in addition to painting the hives, avoid placing them in a long straight row and instead arrange them in a semicircle, for example, with the entrance of each one facing in a different direction, or at least in a southerly or south-easterly direction so that they are exposed to sunlight. For the same reason, it would be important to have easily recognisable reference points all around, such as trees, shrubs, a building or a low wall.
Pay attention to distances: apiaries must be at least 10 m from roads and 5 m from property boundaries — although your local or regional authorities may have imposed more restrictive limits. Even if you are an amateur beekeeper, perhaps with only one hive, you also have other obligations to fulfil. Here in Italy, an identification code must be requested from the veterinary service of the local health authority and apiaries must be declared to the national beekeeping registry. The identification code, which is placed on a signpost, also serves to distinguish your hives. You are additionally required to comply with health regulations. For example, diseases affecting beehives must be reported to the health authority and any treatments applied must be recorded in a special register.


How to build a DIY beehive
A beehive is basically a box comprising several stacked elements, which on the one hand supports the biology of the bee colony and its organisation, and on the other hand helps the beekeeper to manage the hive. To build a DIY bee house, we will take the 10-frame Dadant-Blatt hive for nomadic beekeeping as a reference. The hive components are, from top to bottom:
-
Roof: protects the hive from the elements.
-
Inner cover: closes the hive at the top and provides a cavity between the honey supers and the roof, promoting thermal insulation and ventilation of the hive itself.
-
Honey super: this is the environment in which the bees store the honey, which is then extracted through honey harvesting (a hive can have several supers placed one on top of the other).
-
Brood box: this is the bees’ living quarters, which house the queen, the brood and the supplies of honey and pollen. It has an opening at the front, protected by a small roof, from which the bees enter the hive.
-
Sliding bottom board: closes the hive at the bottom and provides the bees with a landing surface. It is equipped with a net and a tray for both aeration and cleaning, and for counting varroa (the mite that causes varroatosis).
The honey super and brood box contain 9 and 10 frames respectively, which are wooden structures inside which the bees build wax combs. The honeycombs in the super have deeper cells than those in the brood box. Between the super and brood box, insert a queen excluder, which is a metal or plastic grille that confines the queen bee to the brood box. Another hive accessory that you can build yourself out of wood is the bee escape, which lets bees descend from the super to the brood box during the honey harvesting phase.
As for the measurements of the DIY hive, those that you should keep as a reference for your project are its internal dimensions and the external dimensions of the frames. The hive must also be built taking into account the gap or bee space, which is 7-9 mm between surfaces – between combs, between the upper edge of the frames and the super/inner cover, etc. – and which allows the bees to move from one part of the hive to another, without filling it with propolis (wax). So, before making your own hive, take a pencil and paper and sketch out the dimensions of each component (roof, inner cover, honey super, brood box and bottom board), customising your design based on the thickness of the wood you have available and the bee space.
How to build a hive: materials and criteria
For the construction material of your DIY hive, we recommend fir or pine, both of which offer a good compromise between sturdiness, breathability and price. The ideal thickness of the wood used to make the honey super, brood box and bottom board is 2.5 cm to 2.7 cm: the thicker the wood, the better insulated your DIY hive will be from the cold and heat.
You can also use untreated recycled wood, for example by dismantling pallets in good condition – usually made of fir or pine – with a crowbar or by cutting off the ends with a chainsaw. The thickness of the pallet boards varies around 1.7 cm to 2.2 cm: this will work well for the inner cover and roof of the hive. Before dismantling the pallets, we suggest cleaning them thoroughly: spray them once over with a hose or, even better, a high-pressure washer, then spray them again with a solution of water, soap and bleach. Otherwise you can use suitably seasoned wooden boards of the desired thickness that you have cut from logs using a chainsaw and an appropriate cutting guide accessory (portable chainsaw mill).
In addition to wood, to build your DIY hive you need:
-
Wood screws and nails
-
Wooden dowel plugs
-
Vinyl glue for the exteriors
-
Non-toxic paint suitable for hives
-
Galvanised metal sheet to cover the roof and possibly the brood box canopy, and to correctly dimension the tray for the sliding bottom board
-
Hole-cover disc for the inner cover
-
9-frame spacers for the honey super and 10-frame sheet metal spacers for the brood box, all in sheet metal
-
Sheet metal door with entry guides
-
Pairs of handles for the brood box and the super
-
Corner pieces to correctly align the brood box and super
-
Stainless steel anti-varroa mesh for the sliding bottom board
-
Hooks to fix the sliding bottom board to the brood box


As for the equipment for building your wooden hive, in addition to a chainsaw you will need at least a jigsaw, a drill with wood bits, a screwdriver, a hammer, sheet metal scissors, a tape measure, a set square, a spirit level, clamps and a paintbrush. To transport the hive (or hives) to your chosen location, consider investing in the convenience of a transporter. The hive should be raised off the ground approximately 40 cm using trestles: this way it will be protected from surface moisture and easier to handle. If you are installing multiple hives, space them 30—40 cm apart.
The internal measurements of the super can be 38.5 x 45.2 x 16.8 cm (width x depth x height) and 38.5 x 45.2 x 32.6 cm (width x depth x height) for the brood box. The brood box will need a small roof, around 10 cm deep, that overhangs the landing surface of the bottom board. The external measurements of the frames can be 43.6 x 16 cm (for the super) and 43.6 x 30 cm (for the brood box), not including the protrusions along the upper edge for hanging the frames from the spacers, which in turn are fixed to the front and back of the super and brood box. The sliding bottom board of the hive is formed by joining several battens together: the upper battens create the support surface for the brood box, onto which the anti-varroa mesh is fixed, and the landing surface. The lower battens act as guides for the tray.
The inner cover has the same external dimensions as the honey super and the brood box, but with a height of 7 cm, and comprises a plywood panel surrounded by a frame of 4 battens. Drill a hole in the centre of the plywood panel, so that air and humidity can escape, and cover it with a special “escape disc”. The roof must be sturdy: it is essentially a lid with a wooden structure and covered with a shaped metal sheet. The structure is a frame consisting of 4 battens approximately 9 cm high and closed on the upper side by a Masonite/Faesite panel, with dimensions slightly larger than those of the hive.
To simplify construction, we suggest you assemble each of the components (roof, inner cover, super, brood box and bottom board) by joining the wooden pieces together with screws only. You can make the larger pieces – the sides, front and back of the brood box – by joining together several wooden planks using weatherproof adhesive and wooden dowel plugs. Once the panels are made, you can then easily cut them to size, for example using a jigsaw, then assemble them with screws. We also recommend pre-drilling the wood to avoid breaking it when you tighten the screws during assembly. Also, before securing all the parts, pre-assemble them and check that everything fits properly.
Once the hive components are ready, coat the exterior in special non-toxic paint for beehives. Don’t use enamel paint, because it waterproofs the wood instead of letting it breathe. It's more a question of functionality than aesthetics: clear varnish protects the wood from inclement weather and sun exposure, whereas paint helps the bees to orient themselves so that they can return to their hive. Differentiating the hives with paint and/or simple geometric designs will help the bees, which can distinguish blue, green-blue, yellow, black and white (so don’t use green, orange, red or grey).
Beekeeping is an advanced step towards producing your own food: we recommend it if you have a practical mindset and time to spare, and are organised and persistent. It is also a way to stay in close contact with nature, by following these fascinating insects through the seasons and intervening only when they are in difficulty. We suggest you read more about raising animals in our articles on how to farm snails and how to build a DIY shelter for goats or sheep.
Related articles


Winter is here: which tools should you put in storage and how?

Rainwater harvesting: here's how to do it right