How to make an orchard: the complete guide

Would you like to pick fruit from your own trees instead of buying it in the shops? If you have a garden or a plot in the countryside, starting a small orchard from scratch is not an impossible undertaking.
Planting an orchard is like making a long-term financial investment. The plants need time to take root, grow and bear fruit, and can live as long as 20-30 years. Besides, as you know, uprooting an adult tree and transferring it from one place to another is not a task to be taken lightly. Therefore, in order to avoid taking risks, the secret is to start by designing the orchard with a pencil and paper. That is the only way to get an overall idea of the end result, based on your preferences and the context.
In today’s article we talk about how to design an orchard, when and how to plant an orchard and, finally, how to water it: keep reading for all the details.
How to create an orchard
So, how do you go about creating an orchard? Don’t throw yourself headlong into buying and transplanting trees, first study the best approach and how to effectively carry it out. Before designing the orchard, find an area of your garden or a plot of land in the countryside that has good sunlight exposure (facing south, southeast or southwest) and that is protected from the wind, if the locality is frequently affected by strong gusts. The plot shouldn't be shaded, so be aware of surrounding buildings and foliage.
Do you know the characteristics of the soil? Is it sufficiently rich in organic matter and nutrients, is it mainly clayey or sandy? If you have doubts about the soil’s potential, you can have it analysed by a testing laboratory.
Depending on which fruits you would like to grow, you already have the key elements—local climate and soil quality—to determine which fruit trees are most suitable for planting. We also advise you to take into account the trees’ resistance to disease, so that you can keep pesticide treatments to a minimum. When choosing which species and varieties to plant, bear in mind whether you want the fruits to ripen within a short time window, or staggered over an extended period (by planting early, mid-season and late varieties).
If you decide to plant a mix of different fruit trees in your orchard, choose self-fertile varieties: you only need one of each, as they are self-pollinating. Alternatively, trees of the same species, even if they are different varieties, must be present nearby.
Finally organise the planting layout, i.e., the arrangement and spacing of the fruit trees. The spacings must be proportionate to the size of the adult plants and sufficient so that you can work comfortably in the orchard. Calculate a footprint of about 4-7 m in diameter for each tree: the exact distance depends on the species/variety and the training system, as well as on the rootstock and the soil characteristics.


How to plant an orchard
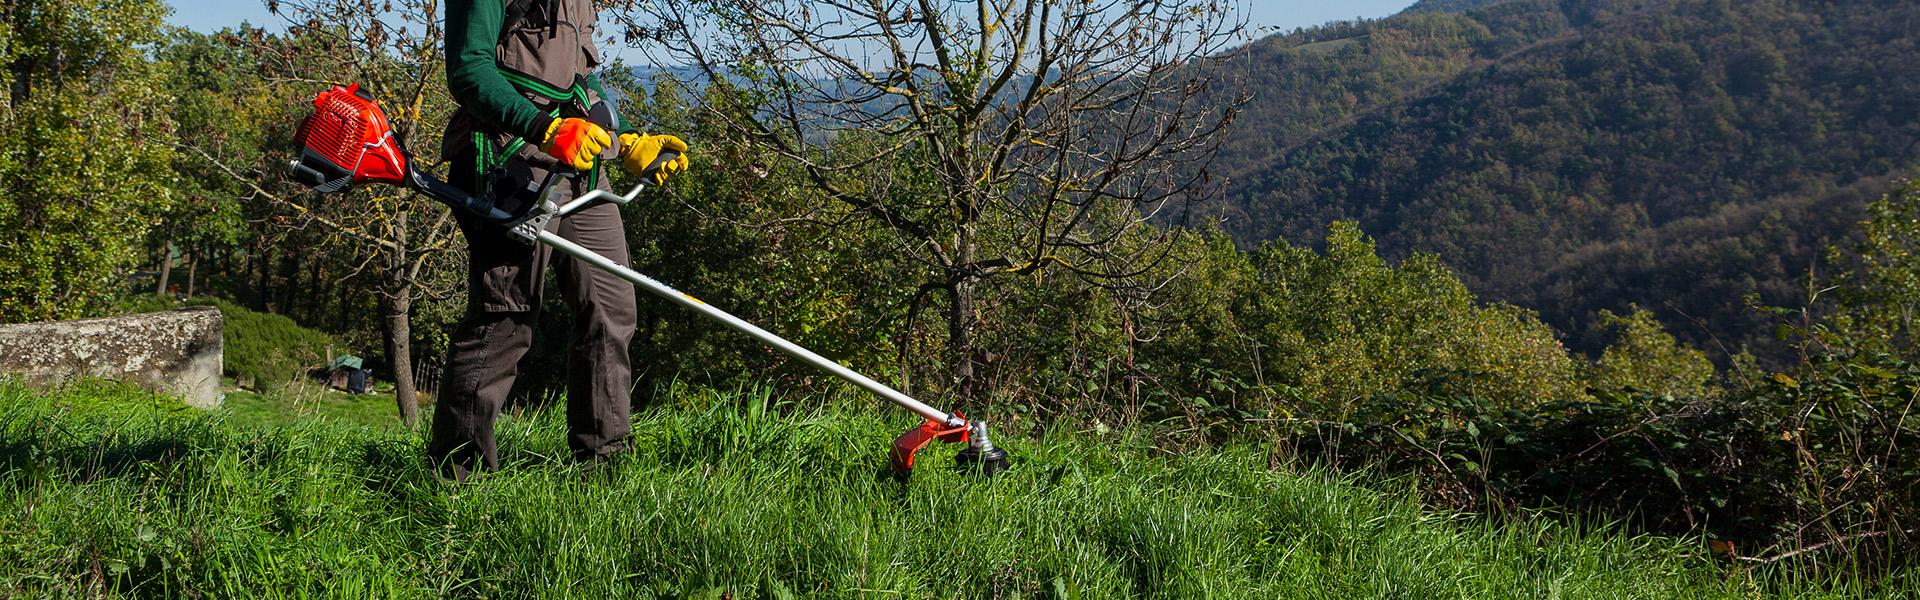
Now that we’ve discussed how to design the orchard, let's proceed to the next step: how to plant the orchard. Clear the area designated for planting your fruit trees—a brushcutter like the Efco new DSH 4000 T and DSH 4000 BP models will come in handy—and till the soil in readiness for receiving the new plants. To break up the soil you can use a rotary tiller, which can be fitted with a plough to reach deeper clods.
If you want to carry around everything you need to plant your orchard without getting too out of breath, use a transporter or a garden tractor with a towed trailer, which will also be useful for all subsequent maintenance jobs.
Proceed to fertilise the soil along the orchard rows: this isn’t standard fertilisation but only basal fertilisation (or pre-planting), which makes the soil more fertile and creates the basic conditions for planting the saplings. For this you can use fertilisers containing phosphorus and potassium in combination with organic fertiliser, such as manure, compost or pelleted organic fertiliser. Thereafter use products based on nitrogen, which is fairly soluble, for routine fertilisation of your orchard. Finish the basal fertilisation by turning over the soil to mix everything in.
Now it's time to plant your fruit trees: create a hole measuring around 50x50x50 cm for each one. Keep the excavated topsoil in a separate pile from the deeper soil, and preserve the same layering order when filling in each hole. This is because the top 20-30 cm of soil are biologically the most active, in other words, rich in the essential nutrients and microorganisms that plants need.


Place each sapling vertically in its hole and if necessary, adjust its height by adding soil underneath so that once the hole is filled, the grafting point on the plant is kept 15-20 cm above ground level. Don't spread fertiliser at the bottom of the hole (it will wash away due to its solubility and the plant will settle further into the hole). Instead mix it into the topsoil and scatter it at the edge of the hole when filling in. Once the hole is filled, water the plant and attach a brace to support and guide its growth.
Before planting bare-root saplings (whips) you can perform root dipping, which involves immersing the roots in a mixture of manure, soil and water to revitalise and rehydrate them.
When is the best time to plant an orchard? October/November if you are planting whips (1- to 2-year-old seedlings). Or late winter/early spring if transplanting 3- to 4-year-old potted saplings.
How to water an orchard
If your orchard contains just a few trees, a hosepipe or watering can should be enough. To irrigate a larger orchard, you may instead prefer to install a micro-irrigation system consisting of perforated hoses or driplines, whether buried or above ground (laid on the soil surface or suspended from wires held by support poles).
In any case, one solution that can help to irrigate your orchard is a petrol-driven self-priming motor pump, which will pressurise the water so that it can be conveyed from the intake point—such as a rainwater butt, transportable tank or ditch—to the hosepipe or irrigation system, even in places where it is not possible to use an electric pump.
Earlier we touched on brushcutters. In addition to supporting you with initial clearing work, a brushcutter will help you to keep grass and weeds under control when planting your orchard: here we list everything you can cut with a brushcutter.
Still don't have one or want to change yours? Here you can find our guide on how to choose the best brushcutter.
Related articles
Wheeled brushcutter or flail mower: which should you choose?

DIY path, 3 ideas for creating one in your garden